
Introduction: How to Draw Poses
Have you ever wondered why drawing poses is so challenging yet so crucial for artists? Whether you’re just starting out or looking to refine your skills, learning how to draw poses can dramatically elevate your artwork. It’s a key skill that adds dynamism and realism to your illustrations, making them come alive on the page.
Mastering human anatomy might sound intimidating, but it’s the foundation of drawing any pose. By understanding the principles of anatomic drawing, you’ll be able to create more complex and dynamic figures. Stick around, and we’ll guide you through a step-by-step process to enhance your pose-drawing abilities, from basic sketches to advanced techniques. Ready to take your art to the next level? Let’s dive in!
What Do You Need to Draw Poses Like a Pro?
Before you start drawing poses, it’s important to gather the right materials. You don’t need fancy equipment, but having the right tools will make the process smoother and more enjoyable.
Basic Drawing Supplies
First, let’s talk about the essentials. Here’s what you’ll need to get started:
- Paper: A sketchbook or loose sheets of drawing paper will do. Choose a medium-weight paper that can handle erasing and shading.
- Pencils: A range of pencils from 2H (hard) to 6B (soft) will give you the flexibility to create both fine lines and deep shadows.
- Erasers: A good kneaded eraser is perfect for lightening lines and making subtle corrections, while a regular rubber eraser is great for clean removals.
- Sharpener: Keeping your pencils sharp is crucial for precise lines. A simple hand-held sharpener works fine.
Optional Electronic Tools
If you prefer digital drawing or want to try it out, there are some great tools available:
- Tablet: A drawing tablet like a Wacom or an iPad with a stylus can make digital drawing feel natural.
- Software: Programs like Adobe Photoshop, Procreate, or Clip Studio Paint offer powerful features for digital art.
- Stylus: A pressure-sensitive stylus will help you achieve different line thicknesses and shading effects, much like traditional pencils.
Having these materials and resources on hand will set you up for success as you learn to draw poses. Ready to start sketching? Let’s move on to the step-by-step guide!
Step-by-Step Guide to Drawing Poses
Learning to draw poses can seem daunting, but breaking it down into simple steps makes it much more manageable. Here’s a detailed step-by-step guide to help you get started.
Step 1: Sketch Basic Action Lines
Understanding action lines is the first step in drawing dynamic poses. These lines represent the movement and flow of the figure.
Understanding Action Lines
Action lines are the backbone of your drawing. Imagine a person standing straight; the action line is a vertical line from head to toe. If the person is bending, twisting, or jumping, the action line follows the curve of their movement. These lines capture the overall energy and direction of the pose.
Practical Examples
Think of a dancer in mid-leap. The action line might curve from the head, through the torso, and down the extended leg. Drawing this line first helps you capture the essence of the pose before adding details.
- Visualize the movement: Picture the figure’s motion. For instance, if drawing a runner, think about how their body curves and where the main lines of movement are.
- Draw the main line: Sketch the primary action line that represents the core movement of the pose.
- Add secondary lines: Include additional lines for the arms, legs, or any other parts of the body that have distinct movement directions.

Here’s an example to illustrate this concept:
In this image, notice how the action lines define the overall movement of the dancer’s pose.
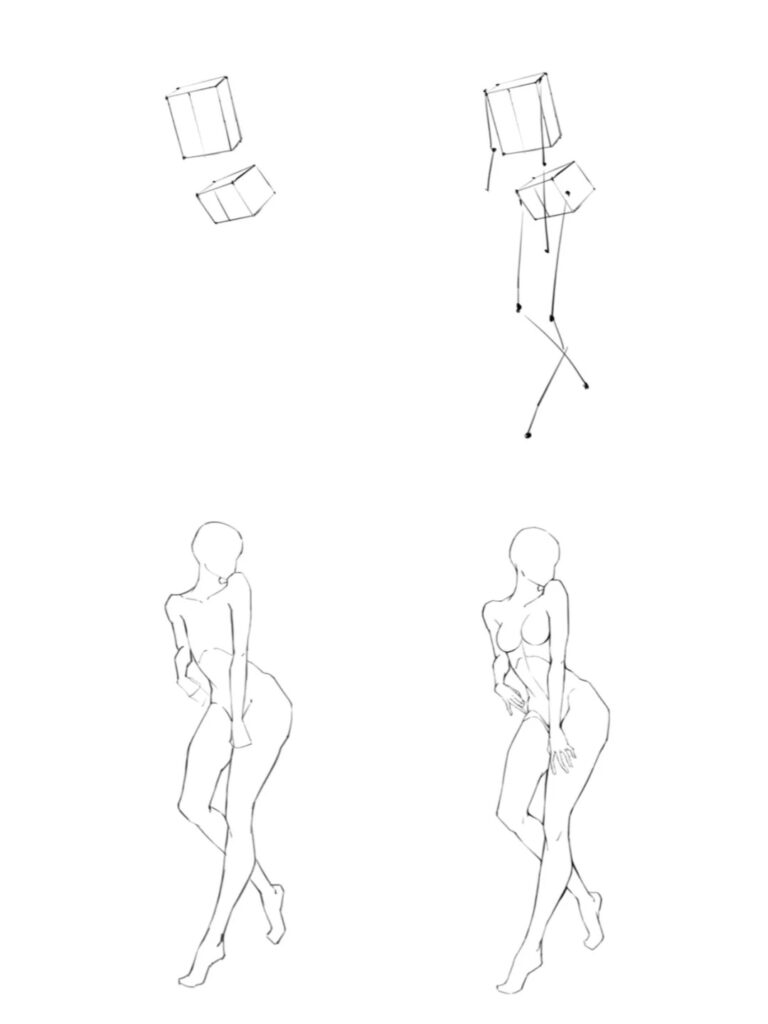
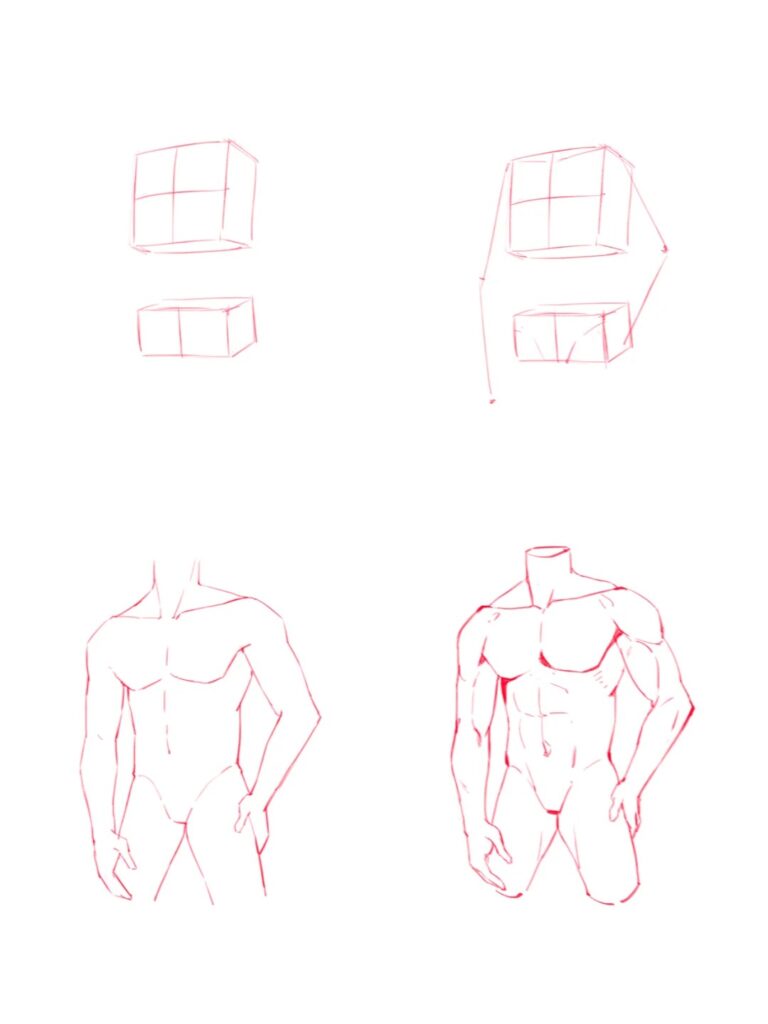
Step 2: Construct 3D Shapes for Body Parts
Next, build on your action lines by adding basic 3D shapes to represent different parts of the body.
Breaking Down the Human Body
Think of the human body as a series of shapes: the torso as a rectangle or oval, the arms and legs as cylinders, and the head as a sphere. This simplifies complex anatomy into manageable parts.
Practical Applications
Once you have your action lines, use these shapes to flesh out the figure. Here’s a step-by-step guide:
- Torso: Draw an oval or rectangle along the action line for the torso. This shape should follow the action line’s curve, giving a sense of the body’s movement and tilt.
- Head: Place a sphere at the top of the torso’s action line to represent the head. Ensure it is proportionate to the torso.
- Arms: Add cylinders for the arms. The upper arm cylinder connects to the torso, while the lower arm cylinder extends from the elbow joint. Ensure the cylinders follow the natural direction of the action lines.
- Legs: Draw cylinders for the legs, connecting them to the bottom of the torso. These should follow the curves indicated by the action lines, representing the thighs and lower legs.
- Joints: Use smaller spheres for shoulder, elbow, knee, and ankle joints. These joints will connect the limbs naturally and provide pivot points for adding details.
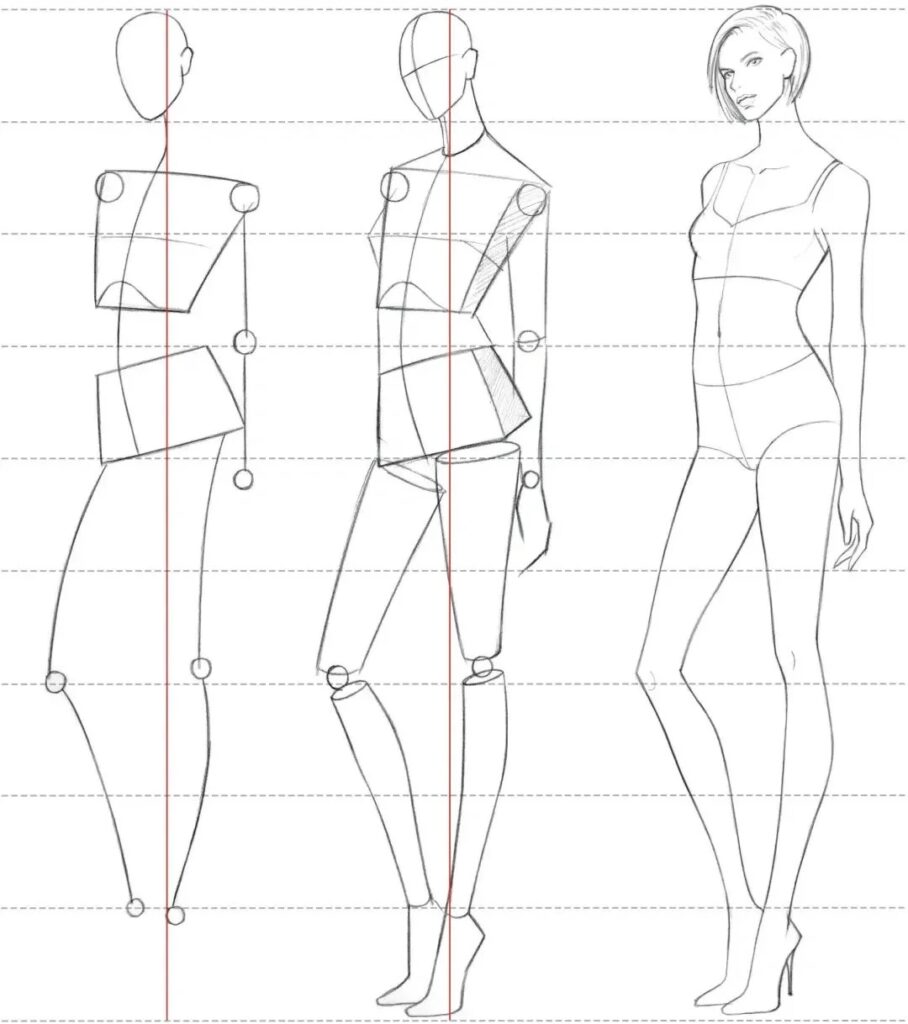
Here’s how it looks in practice:
Notice how these basic shapes build a solid framework for the pose. This method helps maintain proportion and structure.
Step 3: Add Details and Sketch More Natural Outlines
Now it’s time to refine your figure, adding details and more natural outlines.
Refining the Figure
With the 3D shapes in place, start sketching the natural contours of the body. Replace the geometric lines with smoother, more realistic outlines. Focus on making the figure look more fluid and lifelike.
Adding Realistic Features
This step is where your figure begins to take on a realistic appearance. Focus on key details to bring your figure to life:
- Muscles and Curves: Add muscle definition and body curves. For example, sketch the curves of the biceps and triceps in the arms, the shape of the chest and abdomen, and the thighs and calves in the legs. Remember to keep these lines smooth and natural.
- Facial Features: Sketch the face, keeping it proportionate to the head. Add details such as eyes, nose, mouth, and ears. Pay attention to the direction the head is facing and ensure the features align correctly.
- Hands and Feet: Draw hands and feet with attention to their natural shape and position. Hands should have the correct number of fingers, and feet should show the toes and arches. This step requires patience, as hands and feet can be tricky to get right.
Here’s a refined version of our earlier example:
See how the figure now looks more realistic and lifelike with added details and smoother lines. The muscles, facial features, and natural curves make the drawing more dynamic and believable.

By following these steps, you can transform simple action lines into detailed, dynamic poses. Keep practicing, and soon, drawing complex figures will become second nature! Practice with various poses, and don’t be afraid to experiment with different movements and angles.

Tips for Improving Drawing Poses
Drawing poses can be tricky, but there are several tips and tricks that can help you improve your skills. Here are some detailed tips to make your drawings more dynamic and realistic.
Preventing Stiffness in Drawing Poses
One of the most common issues in drawing poses is stiffness. Here’s how to avoid it:
Understanding Human Movement
To capture natural poses, you need to understand how the human body moves. Learn about how people walk, run, and jump. Observe the fluidity in their movements. You can watch videos of athletes or dancers and pause them at different moments to see how their bodies align.
Studying Muscular and Skeletal Structures.
A good grasp of anatomy is essential. Learn about the major muscles and bones, and understand how they interact. Knowing where muscles bulge or contract can add realism to your drawings. You can use reference models like Body Kun, which are highly posable action figures designed for artists. They help visualize different poses and muscle structures without needing a live model.
Drawing Dynamic Poses
Making your poses dynamic adds energy and life to your drawings. Here are some ways to achieve that:
Capturing Movement
Dynamic poses capture a moment in time, often when the body is in motion. Focus on the weight distribution, the angle of the limbs, and the tension in the muscles. Exaggerate these aspects slightly to emphasize movement. For example, when drawing someone running, make the forward leg and arm extend more to show momentum.
References from Athletes and Comics
Athletes are a great source of dynamic poses. Look at photos of gymnasts, dancers, and martial artists. Their poses are often exaggerated and full of energy. Comics and animations are also excellent references. Artists in these mediums often push the boundaries of human movement to create dramatic effects.

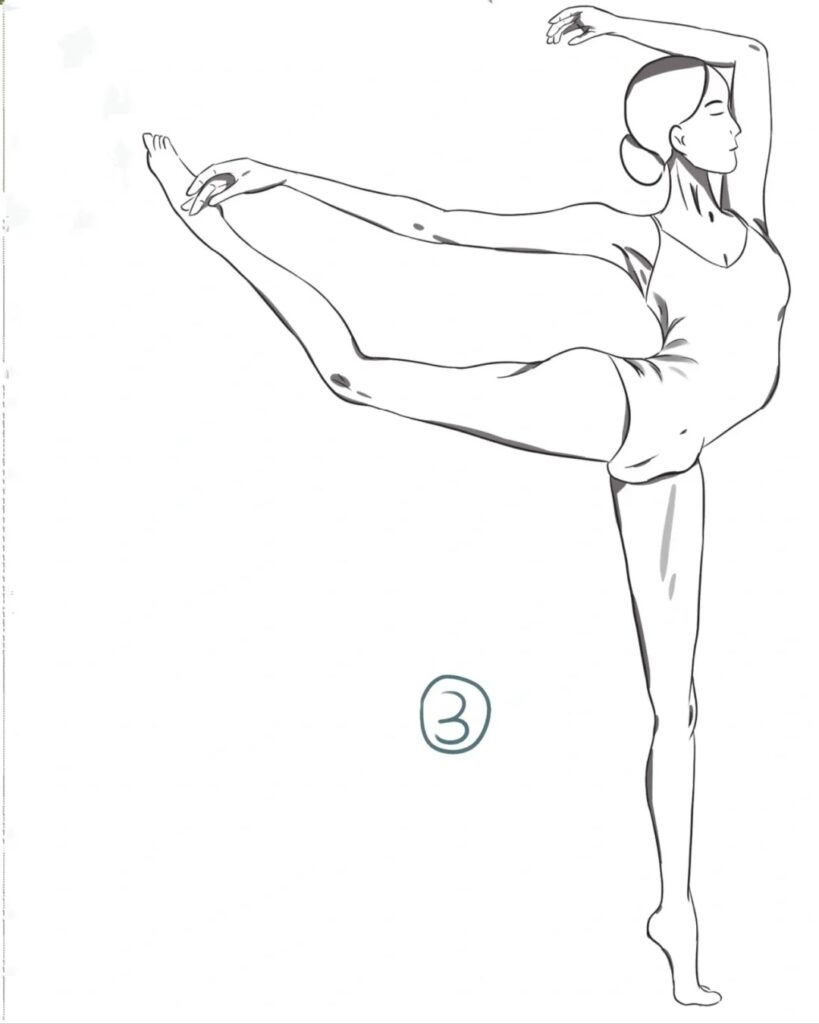
Practicing Anime Poses
Anime poses are unique and stylized, making them great practice for learning exaggeration and fluidity in your drawings.
Benefits of Drawing Anime
Drawing anime can help you understand how to simplify complex anatomy into clear, readable shapes. Anime often emphasizes expressiveness and dynamic action, which can teach you how to convey emotion and movement effectively.
Signature Anime Poses
Anime has its own set of iconic poses. Practice drawing these to understand their construction and flow:
- Action Poses: Think of characters mid-battle, jumping, or striking a pose.
- Expressive Gestures: Anime often features exaggerated facial expressions and hand movements. Practice these to capture emotion.
- Everyday Poses: Even simple, everyday activities are exaggerated in anime. Drawing these can help you learn to add character to mundane actions.
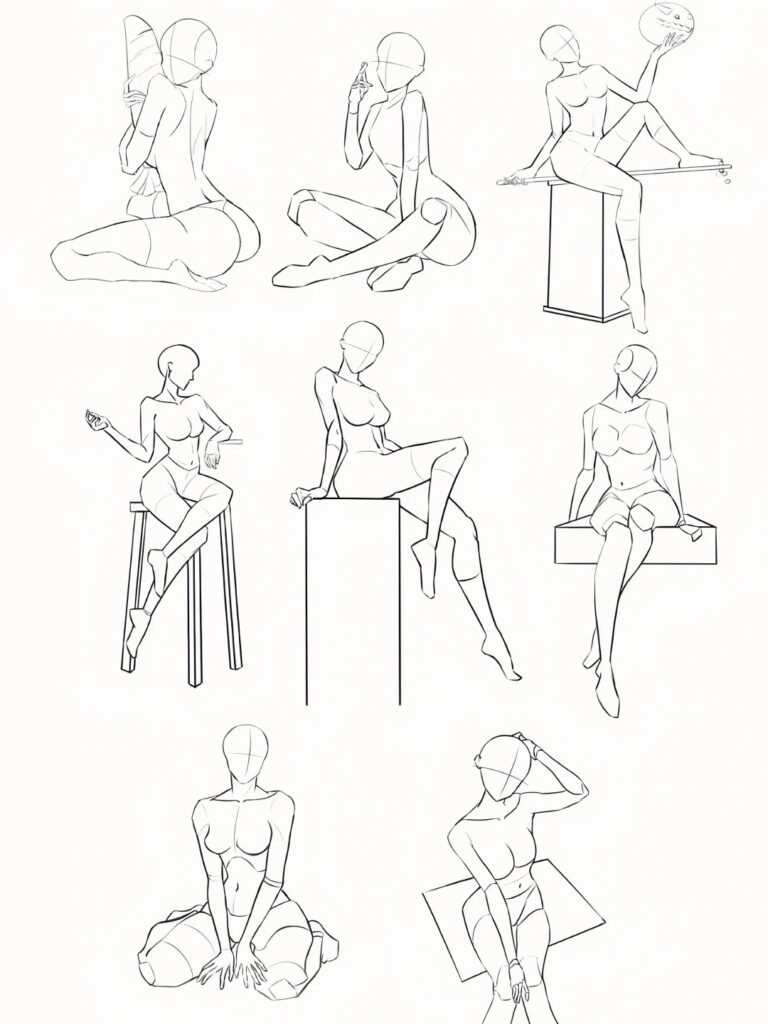
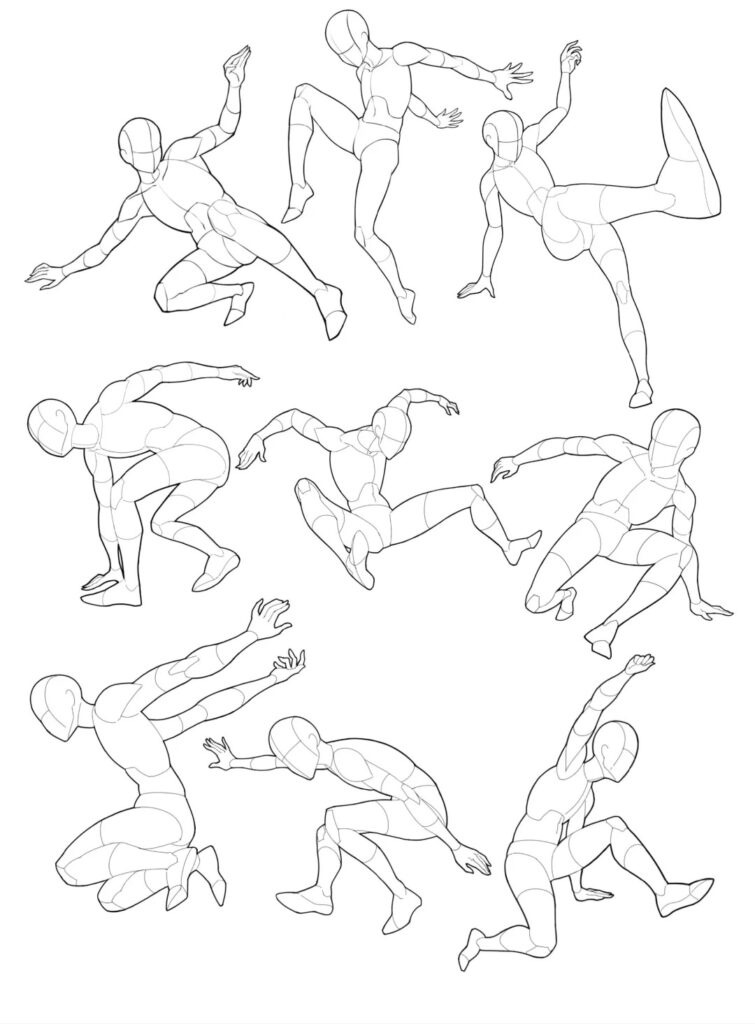
Here’s an example of a dynamic anime pose to practice:
Notice the exaggerated limbs and facial expression, which add energy and emotion to the pose.
Putting It All Together
By combining these tips, you can significantly improve your pose drawings:
- Study and understand human anatomy to add realism.
- Use action lines and 3D shapes to build your figures.
- Observe and practice dynamic poses from athletes and comics.
- Experiment with anime styles to learn exaggeration and expressiveness.
Keep practicing with different poses and styles and don’t be afraid to push your comfort zone boundaries. The more you draw, the better you’ll get!
Common Mistakes and How to Avoid Them
Even experienced artists can make mistakes when drawing poses. Here are some common errors and tips on how to avoid them, ensuring your drawings are as dynamic and realistic as possible.
Identifying Frequent Errors
Stiffness in Poses
One of the most prevalent mistakes is creating stiff, unnatural poses. This often happens when artists focus too much on individual body parts rather than the whole figure.
Proportional Issues
Another common issue is incorrect proportions. Beginners often make heads too big or limbs too short, leading to awkward-looking figures.
Lack of Fluidity
Poses can look rigid when there’s a lack of fluidity and movement. This happens when the action lines are not properly utilized or when the body parts do not align naturally.
Overlooking Anatomy
Neglecting the underlying anatomy can result in unnatural poses. This includes not understanding how muscles stretch and contract or how bones align.
Solutions and Best Practices
Practice Gesture Drawing
Gesture drawing helps capture the action and flow of the pose. Spend a few minutes drawing quick, loose sketches of poses, focusing on the overall movement rather than the details. This will help you avoid stiffness.
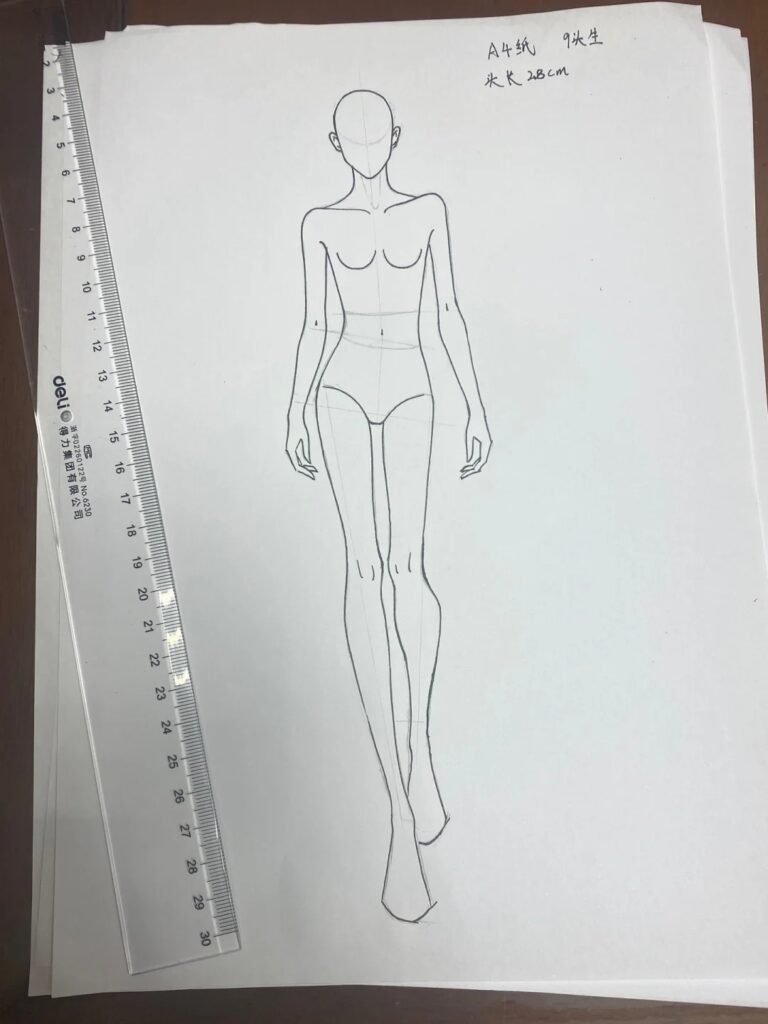
Use Proportional Guidelines
Use head lengths as a unit of measurement to ensure the body parts are proportional. For example, an average adult figure is about 7-8 heads tall. Check proportions frequently as you draw.
Incorporate Action Lines
Always start with action lines to capture the essence of the pose. These lines represent the primary movement or direction of the body. They help in maintaining fluidity and ensuring that the pose looks dynamic.
Study Anatomy
Take time to study human anatomy. Understand how muscles and bones work together. Use resources like anatomy books, online tutorials, or even body reference models like Body Kun to deepen your understanding.
Keep Practicing
Improvement comes with practice. Set aside regular time for drawing poses, experimenting with different techniques, and learning from your mistakes. Join art community, share your work, and get feedback from others.


Conclusion
Mastering the art of drawing poses can transform your artwork, making it more dynamic, realistic, and engaging. By understanding human anatomy, practicing with action lines and 3D shapes, and learning from references and real-life examples, you can overcome common mistakes and improve your skills.
Remember, consistency is key. Keep practicing, experimenting, and learning from your experiences. Don’t hesitate to use tools like Body Kun models and digital resources to enhance your practice.
Ready to take your pose drawings to the next level? Grab your sketchbook, gather your tools, and start practicing today. Your journey to mastering pose drawing begins now!